Sunday, 11 October 2015

Oppan Pistol Style!

The AK platform is an iconic one, and one that I personally like a lot. Over the summer I bought the TM AK-47, and ever since I've been looking for a metal body for it. I don't really enjoy the plastic one that much, and it's starting to crack anyway. For this purpose, I bought an old, non-functioning second hand AK that had a Guarder body on it. My plan was to strip the internals for parts and use the body for the 47.

The previous owner had, however, installed an AR stock on it using some creative brute force, and had cut down the barrel all the way up to the gas tube. The gun had also been painted black all over and later at some point had also had some dark grey splashed on it from another paint job.


The AK stock attachment point had been cut down and the AR stock tube was attached via some large pop rivets. The sling mount had also been taken off, leaving a simple hole on the side.


I didn't exactly fancy the attachement, and since the stock attachment had been ruined, putting on a full AK stock was not really an option.

This project took its first steps when, about a month ago, me and my SO went to a local convention dressed in some Mad Max inspired wastelander gear, and the AKs were an obvious choice for the costumes. I gave her the TM and took the new shorty for myself. To make it even more interesting, I cut down the rest of the stock attachment and added a simple sling mount by bending a nail to fit the slot.


After this, the gun was left alone, until now. Since I could not use the body for the TM, I decided to go another way. I'd stumbled on the Draco carbine on the Internet, and decided this beaten up veteran would be the perfect material for such a build. My plan was thus to build a very short, stockless AK to use as a CQB gun.


Internals check and update

I stared off by cracking open the gearbox so I could see what I had bought. Inside were steel gears, a swiss cheesed piston, a motor that didn't turn and pretty much no lube of any kind.


The motor didn't react at all even with power clearly running to it, so I declared it dead. I found it easier to swap it for a stock JG motor that I had lying around from the AUG DMR build than to try to figure out what was wrong.


With the new motor I got the gearbox to turn very nicely on a 7,4V LiPo, but once I chronoed the gun, it was shooting way too hot for CQB.


I found out I could use almost all of the parts on this build that I had left over from the AUG, since the piston, spring and cylinder from that were also very useful here. The cylinder that was very wrongly ported for the AUG was a great fit for the to-be short barrel of this build. The spring was between an M90 and M100. I did a simple AOE correction with a nylon washer and achieved a very nice result by just using the one.


Since I was building a CQB weapon, I though a bit higher ROF would be in order, so I put in 13:1 gears and a sector clip from CORE.


The gun also came with a self made mosfet but no fuse, so this was the perfect chance to try out the new flat fuse holders and 30A fuses that I had ordered earlier.


External work

As I was planning to build the shortest AK I could, I had ordered a new AKS-74U style front sight and gas block some time ago.


Also on the list of things to definitely take care of was the rear of the body, which at current had a gaping hole on the end, as well as the hole for the sling mount on the side. I had decided to close up the hole on the side and fit an end plate with a new sling mount. I stared off by filing down the nubs of the stock attachment point.


Lots and lots of filing later I took a metal plate from a pile that I had collected somewhere years ago. If I remember correctly, these were back plates for hooks that held cat food samples on a stand somewhere, and I'd held onto these for years. Not in vain, though! The plates had a nice hole right in the middle, which was perfect. 


The plates were also soft enough to cut through with tin snips, which made my work easier. After cutting the plate to size I attached it with chemical metal, and used the leftovers to fill in the original sling mount hole.


Once the metal had dried, I went back to filing and then sanded everything down with wet sandpaper to achieve a smooth surface.


Any gaps that were still left over at this point I filled with filler putty and re-sanded. My hope was that once painted, my additions would be invisible. The sling plate I had in mind was one that was originally intended for an P90 or MP7 that I had bough together with the front sight. It seemed perfect for the job, since it came with an attachment bolt and I had a fitting nut for it. The hole on the back plate had to be enlarged with a round file a bit for a perfect fit, though.


As the rear was now well in hand, I moved onto the front end. I had to shorten both the outer and the inner barrels as well as fit the new sight and gas block, as well as re-finish the hand guard and pistol grip. To start, I noticed the front sight would not fit on the end of the gun's gas tube, so I had to file down the hexagonal attachment point quite a bit.


In fact, I had to file it down so much that in the end I gripped the gas tube (which in reality was an upside down half pipe) so hard that it simply gave in. To be honest, at this turn I did sort of feel that everything had been going suspiciously smoothly up until this point.


Luckily, again, I had stockpiled stuff from before, so I had on hand a short metal pipe that fit the inside of the fake gas tube perfectly. After applying some more chemical metal, I was back in business. The pipe fit inside the receiver and was held in place by the chemical metal, while the pieces of the half pipe and the end cap were glued onto the pipe using the same material.


Now that the gas tube was in once piece and the front sight fit onto it, it was time to check the length of the barrel by using the barrel mounting bracket which would also hold in place the lower hand guard piece. Naturally, the front sight and the bracket were completely mismatched. The front sight had a piece that would not fit in the notch on the bracket, as well as a short fake tube which the bracket simply had no place for. 


You may have guessed it, but I went to the saw, the file and the chemical metal once again. I first did a rough cut so I could actually fit the two pieces together.


And then used the chemical metal to form an easily malleable surface that I could grind into shape.


The end result was a more than pleasing fit, so I could finally move onto the barrel. The cut done by the previous owner was not a very pretty one, so I decided I would do so much better by using a proper pipe cutter.


Had I been smarter, I would have cut the barrel from the other end, but because this is not the Let's Do Everything Right On The First Go blog I cut down the barrel from the front end, thus getting rid of the narrow front section which, you guessed it, is the one that fits inside the sight base. My only choice was, again, the file and coupled with a lot of patience. I have never before, up until now, wanted to own a lathe so bad, or at all, in my life.


Later on I also noticed I had cut the barrel a couple of millimetres too short, and had to file a bit more off in order to drill a hole for the screw that would actually attach the front sight onto the barrel. Once that was done and I had drilled the hole with possibly the dullest drill bit in the world, I went to happily tap it with a steel screw (because the barrel was aluminium, I was certain I could tap it just by turning a screw into the hole). That went nicely until the screw head broke off, leaving the screw in the hole. For a few moments, after a session of middle to severe level swearing, I tried to drill through the screw. No luck, so I drilled another hole. Which was not in the right spot. Third time's the charm, damnit.


Now that the front section finally fit together somehow, I could cut down the inner barrel, put the whole thing together and test fire it for the first time. The funny thing about pipe cutters, however, is the fact that they tend to, by their very nature, squeeze the material, which I did not entirely take to heart until the chrono failed to show any results.


I had a phillips screwdriver which had the perfect size to act as an ad hoc reamer, and soon the BBs would actually fit through the barrel. The technical side of things was now done and I could finally move onto the finishing stages.

Finishing up

I started off by setting up a paint shop in my bathroom, and spray painted all the external parts with three coats on all sides.


Instead of the original black, I wanted the hand guards and the pistol grip in the original colour so, off I went, sanding away until all the paint was gone.


The end result was, unsurprisingly, rather dull in its appearance. I decided to lacquer the surface for a proper finish.


As a final touch, while waiting for the paint and lacquer to dry, I decided to polish the bolt carrier. It was more work than I though, but it adds a nice little extra effect on the gun.


I was first planning on using the regular AK-47 muzzle device on the gun, but it did not look right, somehow, so I opted for an extended bird cage style. The colour is not the same as the rest of the gun, but I actually like it better this way.


The rear sling mount works very nicely for a gun this size and can easily take either a modern hook system or a more classical AK style sling.


Since the gun now shoots about 20 rps, it's good that I have some spare magazines.


I have to say, I'm damn happy with the results I got from this. Altogether I think this project took up around 15 hours to finish over the course of four days.


I'd love to hear your thoughts and opinions on this project as well as read about your own custom builds! Until next time, folks!

Thursday, 24 September 2015

Instagrammin'

I decided to get my Insta on, so in the future you can find quick gun, gear and project snaps on instagram under the username talaar_tech. Let's see how this goes.


Monday, 21 September 2015

Fixer-upper Part 3: TM SIG 552

I can't seem to help myself when it comes to a deal that looks too good to pass (this is your cue to tell me about the bridge you have for sale).

Patient: Tokyo Marui SIG 552
Symptoms: "Shop-tuned to M120 or M150, piston broken IIRC, sat in a closet for 5 or so years"


I got this gun from the very same Facebook for-sale group as the previous two guns in this series. I can't really find that many boneyard guns from shops around here, because (I guess) the number of active airsofters is rather low and shops thus have precious little to offer when it comes to broken guns.

Day 1

Since the previous owner had a feeling the piston had broken, I didn't even bother to try and fire the gun once I got it, but instead dug right in and started taking it apart.

The gun was indeed rather worn and dirty, plus the upper receiver had cracked on both sides just behind the front handguard.


I had heard horror stories about how difficult these guns are to take apart and put together, but I forged on with confidence. My first move, once I got the upper receiver off, was to clean out any dirt and grease, and glue the cracked parts back together as best I could.


I used brake cleaner to get all the grease off and then took a rough file to the inner edges of the cracked parts. I was hoping to make them rougher without altering the look of the outside surface.


This was followed by taping the two sides together with some vinyl tape, which I hoped would both align the parts properly, hold them together while the glue dried, and also prevent any excess glue from seeping on the outside. I was hoping for a very nice and smooth end result.


I applied a rather sticky universal glue (which has worked very well on other plastics in the past) to the inside of the crack by slightly bending the taped-together sides apart and then pressed the two sides back together. I also similarly filed and taped the other side of the receiver, which had the smaller crack right at the edge of the ejection port, and then left the glue to dry.

I continued with the disassembly to get to the gearbox and see what kind of a disaster waited inside. As soon as I got the motor out, I wanted to see if the electrics of the gun were in working order. The motor spun very nicely and without any weird noise, so at least there were no electrical faults.


Once I got the pistol grip and fire selectors off, I found out what a finicky, multi part thing the selector assembly was. It was made all the more fun by the fact that the crescent shaped gears were simply held in place by being stuck between the walls of the gearbox and the receiver, i.e. they fell right off as I didn't have enough sense to hold onto them as I pulled the gearbox out.


There were a number of very small pieces which apparently are all needed in order to make the fire selector work its magic. I'm not saying I could design a better system myself, but it does look kind of over engineered.


I thought I might run into some potential trouble when putting the thing back together, but at least I had plenty of pictures for reference!

Once I took the selector plate off, I also noticed a rather interesting solution to a missing contact surface on the selector. The two contacts had simply been soldered together, so basically the only thing keeping the gun from being fired on safe was the physical piece of metal stopping the trigger from moving. Since I didn't have a spare selector plate, though, I left it the way it was. The block stopping the trigger is, after all, pretty sturdy, so accidental discharge isn't really that likely.


Once I got inside the gearbox, I could not readily tell anything was completely destroyed. The piston teeth had worn down somewhat, but they still had plenty of surface left for the sector gear teeth to catch onto. The piston had one metal tooth and a ported aluminium piston head. I decided to keep using it until it breaks.


I hadn't chronoed the gun before opening it since I was under the assumption there was something broken in the gearbox, so I had no idea about the rate of the main spring. The wire seemed to be rather thick, but as I compared it to an SHS M110 that I had lying around, I noticed the mystery spring was also quite a bit shorter.


So, basically, still had no idea what the rate was. At first I thought I would put the gun together with the mystery spring first, then put in the M110 for actual use, since an M150 especially would be complete overkill for a weapon of this size (which is the rate the previous owner thought the spring might be rated at). In the end, I decided against this idea and opted to test the mystery spring with a gun that requires a bit less work in the reassembly department.

The other bits inside seemed to be fairly high end. All gears were made of steel, although unmarked. Still, definitely not the stock Marui gears that are, I guess, pressed together from leftover porridge and snot.


The gearbox was shimmed pretty ok from the get-go. The gears had very little play with the box screwed together, but apparently they were shimmed a bit too close together, as is apparent from these marks on the sector gear.


As I took out the gears to degrease and re-grease the gearbox, I kept my eye on where all the shims came from so that when putting it all back together, I could switch shim thicknesses to set the height of the gears in relation to each other properly while still keeping the same overall gear height inside the gearbox.

While the gears soaked in brake cleaner, I moved back to the upper receiver, as I had more plans on how to make the glued parts hold together a bit better.

I sanded down the insides of the front of the receiver with 80 grit paper in order to, again, give the glue a better surface to stick onto.


And now came my masterstroke. I cut out strips from a drinks can and sanded the surface down.


Finally I poked some holes into the strip to allow the glue to both dry faster and also seep through the metal and possibly make an even stronger bond with the plastic surface. All that was left was to press the strip into place and cut out any excess.


I put similar strips on both sides, anticipating the old ABS plastic might be on the frail side and the receiver might crack on the other side in the future. I used a smaller piece on the little crack on the corner of the ejection port, and a larger on the side where the piece had snapped off completely. I left the glue to dry overnight and moved back to the gearbox.

No major hiccups occurred in putting the box back into working shape. I greased it all around rather amply and tested the compression of the cylinder with and without the nozzle (and saw that it was good). I put the box together only so far that I might test fire it outside of the gun, and that is when I noticed the trigger wasn't returning to the front on semi. After some puzzling, it became obvious there was no trigger return spring, and the trigger was simply pushed back into place on full auto by the trigger switch return spring (on semi the cutoff naturally snapped the trigger switch back over the trigger).

So, in the spirit of this blog, I went and did it all again. Unscrew, release main spring, the works. At first I thought I'd simply lost the return spring at some point, but as I went through my pictures, it was apparent there never was one. I racked my brain for a while as to where the get a replacement part, since I did not have one in store.

A quick session of back and forth pacing got my brain working, and I went for my SO's stash of safety pins. I reasoned that if I only found a suitable size, I could bend it to shape and be done with it. Of course there was none large enough, but as luck would have it, I noticed I could just bend it open just enough to slip it onto the trigger post. After that, with some pliers and side cutters, I fashioned a perfect trigger return spring (still in progress pictured below).


With the new spring in place, I set out to reassemble the gearbox. Of course, this time the main spring would resist my attempts until the very last, whereas the first time it had simply slid in without any problems. I had to try three or four times before I got everything in place, but after that I was set. I ran into no more mishaps in putting the gearbox back into the gun and reassembling everything. Unless you count the fact I had not properly run the negative motor cable into a slot on the side of the gearbox, and had to again take out the selectors and all sorts of little bits and pull the gearbox out of the receiver in order to thread the wire through the slot. Wheeee! At least nothing broke. I left the gun with the lower receiver assembled in order to let the glue on the upper dry and then finish the assembly.

Day 2

The following day I returned to attach the upper and lower receiver together, and naturally wanted to test how strongly my glue had set. Some of the edges of the aluminium strips were not completely attached, and as I pulled on them with less than moderate force, the strips simply came off. My glue obviously was not really at all compatible with my materials. In the end I had to sand the surfaces down for a second time, and this time went with the ever trusty cyanoacrylate. Super glue itself is rather poor when it comes to stressing the joint (it tends to crack when bending, for example), but since I now had a large flat area and I was basically making a composite piece of material, I decided to give it a go. Super glue worked very nicely in attaching the two surfaces together, and the only problem was the dried glue on my fingertips afterwards. I just had to cut out the excess material that covered the holes in the plastic.


In the end, the seam was left rather visible, but the joint is extremely sturdy now.


I finished the project off by first installing a fuse box and a fuse since the gun did not have a box, let alone a fuse, when it came to me.


With the gun all in one piece, I hooked up a battery and dry fired the gun a few times. Everything sounded great, the gun fired as intended and all was well. Apart from the fact I had not a single magazine, because the gun came with none. The SIG 552 uses proprietary magazines (of course), so I had to improvise. Digging through my selection of mags, I found out the MP5 ones were slim enough to fit the magwell. They did not lock into place, obviously, but I had enough hands that I could set up a chrono and shoot for a bit to see how the old girl performed. And I must say, I was pretty pleased with the results.


Now, if I could only get my hands on some magazines, I could get rocking with this thing.

Wednesday, 16 September 2015

Hi Capa Update and Farewells

I know, it's two months since the last update. I have a lot new projects lined up, some of them actually already finished and photographed, but I just lack the time to do the write-ups. Until then, though, here to whet your appetite is a quick post about a small update on the WE Hi Capa I wrote about earlier.

I got a bit bored with the gun after a while, to be honest. The lack of Serpa holsters for the model also got me a bit miffed, so I've had the gun just sit on my shelf gathering dust. I've tried to sell it off a few times, and now I found a buyer. I am ready to bid adieu to the very nice but, for me personally, useless pistol.

As you may remember, the gun was missing the safety lever plunger and its spring, which I replaced with a piece of wire jacket and a toothpick.


I though the new owner might find this arrangement a bit odd, so I decided to go ahead and quickly fashion a new plunger to replace this admittedly fine piece of craftsmanship.


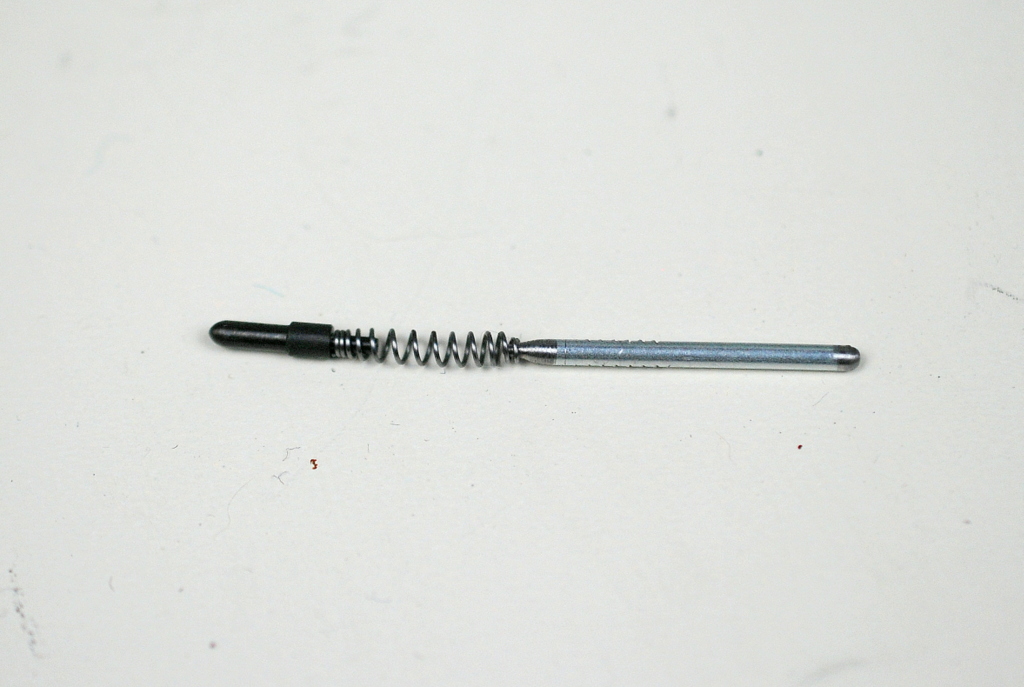
I got a short piece of spring from a disposable lighter (the same spring I used as a cutoff lever return spring on the M4). The slide lock plunger fit on the one end perfectly.


I wanted to have the other end of the spring in the same shape, so I carefully squeezed it from several sides, resulting in a surprisingly nice taper.


Next, I took some raw material to fashion the safety plunger from. If you know me, you know I very rarely throw anything away. This is why I could easily source a fine mandrel from a used pop rivet (I knew I kept these for a reason), which I only needed to machine into shape. My first idea was to simply tighten it on my rotary tool and grind the ends to suit, but it turned out the mandrel was too thin to properly tighten. A few twists of electrical tape fixed that though!


The rotary tool at 10,000 rpm, I first did a rough grind on the end that would face the safety, in order to get a roughly round shape. Then I finished it off with some 600 grit sandpaper to get a smooth finish. Compared to filing by hand, this was a very nice method to get what I wanted, plus the end became round almost by itself.


The second part of the job was to turn the mandrel around to grind down the other end. I wanted a roughly similar shape to the plunger as the original slide stop plunger.


For this end I only used a rough file, as I noticed that the spring caught on a rough surface better than a smooth surface.


It turned out I had given myself a bit too much working allowance on the mandrel, and had to cut it down by around 2mm and rework the end, because it was too long even with the spring completely compressed. I chose to redo the safety end as that was easier to get right. After that I simply inserted the spring-plunger combination, which fit in very nicely.


And finally, all that was left was to reinstall the safeties and the slide.


I got a very nice, smooth yet crisp movement of the safety from this endeavour. I guess this mostly goes to show you don't always need to buy spare parts if you can make them. Have you made your own spare parts? Let me know in the comments.

Now I'm off to put this baby in a box and ship it off to a new owner. More projects coming up!

Thursday, 16 July 2015

No Hands Reload

Okay, the title is slightly misleading since I obviously still have hands and use them, but whatever.

It's again been a while since my last post. Sadly this summer seems to be wasting away in the airsoft department. I can't even remember when the last Sunday skirmish took place.

I've naturally been scratching the itch by getting more gear, and yesterday during a dull moment I started playing around with some of the new stuff I got, and this is what came out of it.


The plate carrier is an ACM MBSS replica, the FastMags are also non-brand knock offs. They're also actually for 7.62 magazines, but AK mags won't fit in there right side up due to their large bottom plate. The much slimmer AR mags still fit in fine and the pouches had a very positive retention even with them. I'm not sure of the actual feasibility of this method. What are your thoughts? Could this actually be used or is this just silly derping?

Well, that's it for now. Hope to return shortly with actual tech content!