Showing posts with label G36C. Show all posts

Thursday, 19 March 2015

A New Battery Will Make Me Go "ROF ROF ROF!"

Last weekend was the first game since ages, and I got to run around with both the new MP5K PDW as well as the G36C with its M4 magwell. To make it really short and sweet: Everything went extremely well. Mostly anyway.

M4 magwell

In one very stressful situation I didn't quite manage to slap in a new M4 mag as quickly as I would have hoped, but I put that solely on the newness of it all. Later on it went pretty much as well as I'd expect. Once you get the "reverse AK" reload down, it's definitely quicker than some rifles (the AUG for example). No feed issues whatsoever through 400ish BBs from several magazines.

First slide the back end in, then twist forward while pushing up. The magwell bevel will guide the magazine in perfectly.

MP5K 

The MP5K performed very nicely, and the lightness of it made it a real joy to use. Very quick to pop out of cover and hose someone down. One of only two gripes came up after a rather lengthy episode of running around, when my goggles developed a nice film of moisture on their upper edge, exactly on the spot where you'd need to look through to be able to aim down the very low-sitting iron sights that I was using at the time. This is easy to alleviate with a scope mount and a holo or reflex sight, which will change your head position to a more upright one when aiming.

It does look slightly comical with the sight. The distance from the top of the sight to the bottom of the mag is only slightly less than the overall length of the gun with the stock folded.

The other problem I ran into was with trigger lag, or more accurately the time it took the motor to cycle the action. At one point, I was intending to quickly pop out of cover, shoot one single well aimed shot and take cover again. As more seasoned players are surely aware, the default NiMH batteries that come with guns aren't all that great powerwise. I peeked over the edge of cover, tapped the trigger and only heard the motor spin for a bit, but not enough, so no shot was fired. I had to slink back into cover as I was immediately spotted and had no time to shoot again. Obviously what happened was that the motor had wound the spring back a ways, but not quite enough to make the sector gear release the piston.

To treat the trigger lag issue, a better battery with more amperage is the obvious first choice. It's easy and quick to do, and has worked on my other two AEGs very nicely.

As I have been toying with the idea of upping the rate of fire on the MP5K anyway, I thought I'd devise a little test to go through the batteries I currently have, possibly finding a good, ROF-upping battery replacement that way.

Battery testing

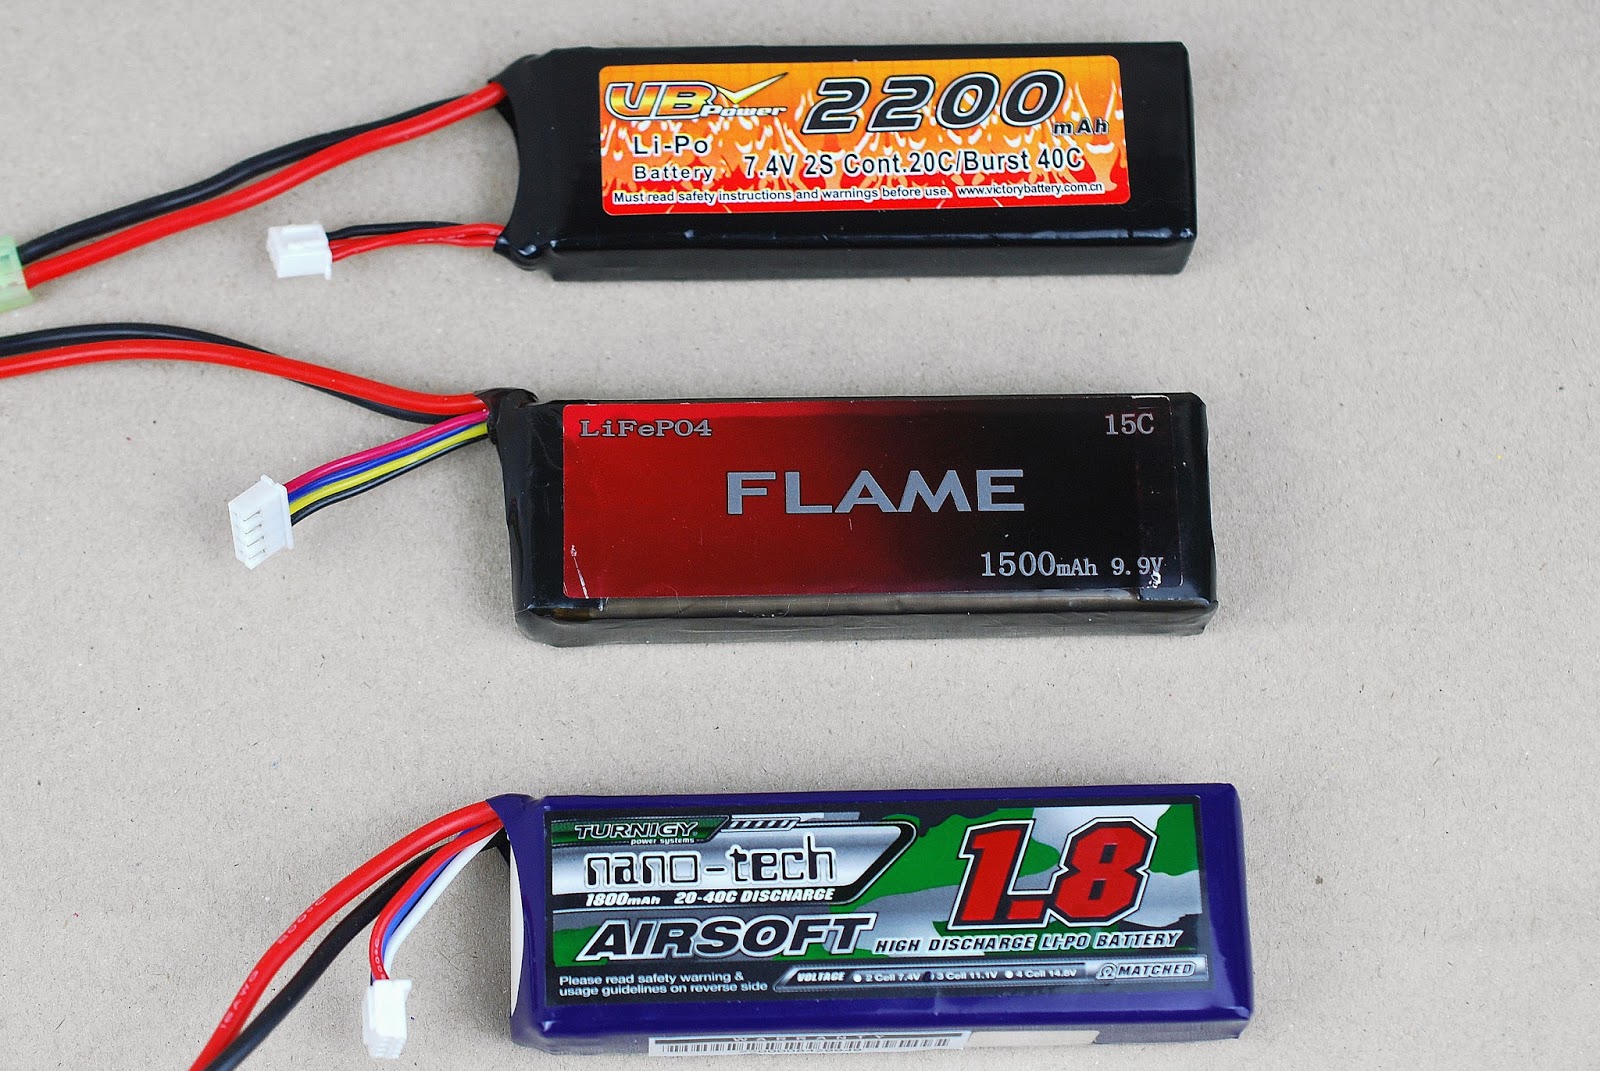
I set up the chronograph (UFC Pro), loaded up some mags and went to work. The batteries used, in addition to the stock 8.4V NiMH that came with the gun, were the following:

  • VB Power 7.4V LiPo (2200 mAh, 20-40C)
  • Flame 9.9V LiFe (1500 mAh, 15C)
  • Turnigy 11.1V LiPo (1800 mAh, 20-40C)


All batteries were charged fully before starting. They all have their stock mini-Tamiya connectors at this time. I have gold-plated Deans connectors already on order, and will repeat this test once they arrive and I have them installed. That should give some hard data on what kind of effect (if any) the connector has on the system's efficiency.

I listed the batteries and their respective rates of fire (ROF) of in both rounds per minute and rounds per second on the table below.


Battery ROF(rpm) ROF(rps)
8.4V NiMH 750 12.5
7.4V LiPo 857 14.3
9.9V LiFe 1000 16.7
11.1V LiPo 1500 25


One interesting point of note is that the lower voltage LiPo outperforms the higher voltage NiMH by a fair margin. According to my understanding, this is simply due to the fact that the NiMH battery basically gives out too little power for the motor to turn effectively.

With all the Lithium batteries, it was practically impossible to get the gun to half-cycle, so any new battery should at least fix the non-firing situation I encountered while playing.

As for upgrading the gun, I would like to reach a ROF roughly around 20 rps (1200 rpm). Of course, with my luck, that lies directly in between the LiFe and the the high voltage LiPo. The latter would empty the 90 round midcaps in 3,6 seconds of full auto. Yes, I'm sure it would be fun for a while, but the internals would likely break somewhere (at least the trigger contacts would suffer without a MOSFET), and I'd be out of BBs really quickly.

I'd be lying if I said that during the test I wasn't even slightly worried something would go wrong with the 11.1V LiPo, especially since the spring in the MP5K only gives out about 1 Joule and the gearbox is completely stock. With no angle of engagement correction and a fairly low powered spring, I was definitely expecting some sort of premature engagement. No sign of that, though, during the 40ish rounds I put through the gun with the high voltage LiPo. I'm sure something would break in the long run, though.

Furthermore, finding an 11.1V stick LiPo that would fit in the gun might also prove somewhat problematic. I am pretty fond of the LiPo batteries in general, though, so I'll most likely replace the stock battery with a 7.4V LiPo when the time comes. Apart from that, I'm not entirely sure at this point which way to go about reaching the 20 rps mark. High speed gears, a new motor to turn them, something else? I'm open to all suggestions.

Friday, 13 March 2015

G36C M4 Magazine Well Conversion

As mentioned in an earlier post, I recently got some magazines to go along with the M4 magwell conversion for the JG G36C (G608). In this post I'll go over the installation and some quick testing.

The idea behind the conversion kit is to enable the G36 series rifles to use M16/M4 magazines instead of the proprietary H&K ones. The magazines' smaller bulk, higher availability and proliferation are the reasons I opted for the conversion. Of course it also changes the look of the gun somewhat.


Several companies make these airsoft conversion kits. Mine is by BattleAxe, and I chose it because of the many praises I read about it.


The kit is a simple, one piece item that's intended to replace the original magwell of the G36. I hear the latest generation JG G36s have a different hop-up mechanism compared to the old ones and thus require a different kit or some modifications to install and/or feed properly. If you're getting one, make sure to compare it to the original magwell before purchase.

Installing the kit itself is a very simple process, but mine did require some extra work.

Installation

To start off, you need to remove the old magwell. Start by pulling out the pin next to the trigger guard.


After removing the pin, push the magazine release lever as if you were removing a magazine and simultaneously pull the magwell downwards from the end closest to the trigger. It will tilt downward, out of the gun, and you can then remove it.


In a perfect world, you would simply reverse this process to install the conversion kit. This is not one, sadly. Some adjustment work was required first. To begin with, the reverse side pinhole on the kit was noticeably smaller than the pin, so I had to widen the hole a bit.


I started off with a rotary tool and finished with a small round hand file, testing the fit until the hole was just large enough. I didn't want to make it too large or the magwell might wobble when installed.

A couple of spots also required some extra work as there were some burrs left over from moulding. This was especially true regarding the tube that mates with the magazine.


I wanted to make the edge as clean as possible in order to avoid any problems with feeding and to eliminate the risk of material breaking off and entering the gun (Paranoid? Possibly. At least it doesn't hurt too much). I used a file and a crafting knife here. The plastic is apparently fibre reinforced, judging by the scraping sound it made when cut. That should add some longevity.

Once the pinhole and the feed tube were filed and wiped down to remove any residue, it was time to install the kit. To do so, you simply place the notches on the front of the kit in the tabs on the receiver, just like the original magwell, and snap into place. The kit was ever so slightly wider than the receiver, so it did not slide in without a little bit of force. The upside is that it will sit in place very snugly.


Once the kit is in, replace the pin, making sure to mate the small ridges on the pinhead with the grooves in the pinhole.


As can be seen here, under intense light the conversion is of a different colour to the receiver, but under normal lighting conditions the difference is usually not even noticeable.

That is the installation, finished. The original magazine release lever becomes non-functional, and you can only use the button on the left-hand side. Not ideal for lefty shooters, but still workable (I guess, from my own awkward attempts. I had no real lefties in store).

Since this conversion requires no modification of the gun, it is completely reversible. Even in field conditions it can be done literally in seconds. If you have the original and the conversion with you, you can alternate between them depending on which magazines you want to use, whenever necessary.

Magazines

As I was shopping around for magazines to use with the conversion, I became rather overwhelmed with the multitudes of choices available. I've never owned an AR, so this was all new to me. You have your standard ones modelled after the real steel 30 round magazines, the short types that mimic the 20 round variant, and both are available in plastic as well as metal. Then you also have both short and long ones in the PMAG configuration, for example. And would sir like his magazines in black or perhaps tan? The choices obviously don't end anywhere near here.

The magazines I ordered were made by King Arms. I had heard that MAG magazines feed nicely with the conversion but alas, all other choices despite their existence, were out of stock at the time.

I have previous experience with KA mags on my AUG, and I'm not totally happy with them. They needed some work to make them feed better, but I hope the M4 magazines are good to go as is.

The magazines in the store were sold without any kind of packaging, and thus each came with its own price tag.

Who doesn't love pulling stickers off stuff? Me.

As always, no matter how carefully I tried to peel them off, the price tags left behind a sticky residue that will ruin any perfectionist's day.

Brilliant.

On the upside, here's a chance for me to share a cool trick I picked up from my SO. To get rid of the glue, you don't need strong chemicals or abrasives, nor would you want to use either here anyway. What you do need is some oil. Simply rub some of it, preferably plant based, on the glue with a paper towel or a rag.

Some olive oil (extra virgin freshly stolen from the kitchen in my case) rubbed on the glue residue

Wait for a bit and proceed to rub the residue gently with said paper or rag. In a process I can only imagine is fuelled by magic, the oil dissolves the glue, letting you simply wipe it away.

Glue-B-Gone!

The last step, in case you don't enjoy oily magazines, is to wipe them down using some soap water, and presto!

Better than new, literally.

Now that my mags were all good looking, shiny, and lightly lemon scented, it was time to move on to some quick shooting testing.

Testing

I loaded up two magazines and shot one in single shots and the other in short(ish) full auto bursts. During those 240 or so BBs, I got no feed problems whatsoever. At least this short initial test would seem to indicate that the King Arms magazines work nicely with the conversion kit as well. They also fit the new magwell very nicely, so there's very little wobble in any direction. The inside of the magwell has some ridges that hold the magazine in place, and I found that the easiest way to insert a mag is a sort of "reverse AK" method, where you slide the rear edge of the mag first and then twist it forward. Regardless of how you put them in, the magazines will stay firmly in place once they lock. When you want to release them, they slide out effortlessly, so at least in that regard there is nothing to complain about. Mag flipping optional.

As a final note, the conversion kit has an s-shaped bend inside it to facilitate the different placement of the feed chutes between the two magazine types. On the G36 magazines the chute sits about a centimetre further back from the front edge of the magazine, so the M4 mags would not meet up with the hop-up without the bend. This will leave you with some extra BBs that fall out when changing mags, but that is a rather small price to pay for the convenience. 


That's all for now. If I run into problems with the conversion in the field, you will be sure to hear about it here. Until next time!

Friday, 6 March 2015

New Arrivals

Hello again guys and gals! I know this blog has been as dead as a doornail for the past month or so, but it's about to change. The rapidly fluctuating weather and other business have seriously dug into my airsofting, so pretty much nothing has happened since the last update. I don't think I've even been to a weekend skirmish since the last post in January.

The spring, however, is not only in the gearbox but also around the corner (yes I know that's a horrible way to use these particular words), and thus I'm looking forward to reactivating in the BB shooty business. To help things along, I went and bought new stuff to play with. Yes, both in the field and on my workbench. I obviously have some pent-up punning in my system, sorry.

I have read so many praising words on reddit's airsoft sub about the Galaxy G.5 that when I saw it on sale, I just had to grab one for myself. It's a replica of the H&K MP5K PDW, and I just love it. I seem to have a thing for H&K guns, since I'm also drooling over the G3 and the HK416. When money decides to depart my wallet, you'll hear about it on this blog.

The Galaxy MP5 in question ended up offering more than I expected. The box not only contained the gun, hicap magazine, cleaning rod, charger and a battery as usual, but also some extras such as a second magazine, a speed loader and a carrying strap.

That's a lot of stuff for a gun that cost well under 100 euro 
In short, it seems like an ideal starter gun for someone wanting to get into the sport. For now, it seems and feels really great, especially for the price. I'll get more into the details and specifics in a future review post.

I couldn't obviously just get the gun, so I went all out by getting a bunch of extra MP5 mags (I never liked hicaps), mag pouches, a radio headset and PTT, some M4 magazines and a belt attachment for a Serpa holster I had bought for my P226 earlier.

MAG midcaps in the 90 round range. Got a great bulk offer for 8 mags and just had to take it.

Triple mag pouch attached to the leg panel I got for Christmas. Takes in 6 mags, staggered slightly here for easy access. I'm seeing in my mind a very light QCB loadout incorporating this for the coming summer.

Z-tac Bowman Elite II and Z-tac Peltor PTT. They work very nicely, although I had a short moment of panic before I realized I hadn't pressed the jack all the way into the PTT and thus wasn't hearing anything.

King Arms M4 midcaps (120 rd) with the Battleaxe mag well conversion kit I got for the G36C earlier. Will be writing about these a lot more once I install the kit and field the gun and magazines.
Last but not least, the non-brand belt attachment for a Serpa knockoff, here already attached to the authentic holster. I got the holster used, and it only came with the paddle attachment seen on the right. Hoping against hope, I bought the belt attachment simply based on the similar look of the holes, and luckily the copy job has been very accurate!

I think this is all for today. As I said, there's a lot more to come. I will be reviewing the MP5K in depth, doing the mag well conversion for the G36C, recounting my field experiences with it and the Z-tac headset and much much more! In the words of my spirit animal, Bender Bending Rodríguez: "I'm back, baby!"


Friday, 23 January 2015

Stay Frosty

It's winter and it's cold. Well, more or less. Seems the temperature around here goes through a cycle of around 20 degrees, from freezing to few degrees above zero. So any given day it's either the fear of frostbite or slipping into a puddle.

A while ago we had a game in what was closer to the former temperature. Not only was it cold, but also windy. Not exactly ideal. Our typical weekend skirmishes would last for several hours, but this one was over after just two sessions. No one was really enjoying the weather and, more importantly, our guns started sounding rather unhealthy.

Some authentic Finnish snow right there

I had both of my AEGs with me as I wanted to see how the AUG would finally perform in the field. The G36C was there as backup in case something went wrong, but I actually ended up lending it to a team mate. He had had a malfunction in his primary some time ago and had nothing to play with, so a third team mate had brought a second gun with him to lend. That thing then refused to work at all. It just would not fire, not a single shot no matter how many different batteries we tried. Good thing I had one to spare. From what he said later, the G36C functioned perfectly all the way through. Not so with the AUG. Not even close.

I was using 0.25g bio BBs by G&G, which I've heard good things about, and should have performed very nicely. I shot some very nice groups with them in my apartment earlier.

Discounting the one outlier, a pretty nice grouping at 15 metres
While obviously not perfect, I was still expecting some rather consistent performance. I'm guessing the cold and my rubber G-hop did not work well together at all, since I was either lacking range, getting ridiculous amounts of over hop or under hop, or getting sideways spin, all without ever touching the adjustment wheel.

Towards the end of the second skirmish session, I was unable to hit the enemy at five metres because the scope had fogged over and so I had no clue where my BBs were going. I simply walked upright toward him, shooting from the hip. His gun didn't perform too well either, but he finally hit me at around three metres, which I only barely felt. It would have been more effective to just throw fistfuls of BBs at each other. At that point I also decided that I'd play no more, because the gearbox started sounding really unhealthy. I'm guessing the grease inside began to harden in the frost and the action seemed way slower. Needless to say, all of that made the first field test of my "finished" DMR pretty much a complete nightmare.

Slightly less than ideal aiming conditions
In all honesty, I now understand how people can get tired with their project guns. I've spent quite a few hours on the AUG so far, and it's still not doing what I want. But I will not be denied! I will have my DMR. Right now I'm thinking an IR-hop might be the answer to get me where I want, and even allow for winter games if I find a grease that works in the cold as well. It might be a while before I get the materials and the requisite interest, but it will happen. If not this winter then the one after.


Sunday, 28 December 2014

G36C Transformation


As I mentioned in my previous post, I got a new stock and foregrip for the G36C for Christmas. Installation of both pieces was rather straightforward.


The foregrip is simply installed by loosening two flat-headed screws on one side of the grip, placing the grip on the rail and re-tightening the screws. The top of the grip actually separates into two individual pieces to allow installation even on a rail where you could not slide it on, which is a pretty handy feature in my opinion.


The stock installation is almost as straightforward. To remove the old stock, you simply push out the axle pin inside the hinge. I used a large allen wrench to do the job. Once the pin is removed, the stock can be pulled off, and the new stock put in its place. I found it easiest install the new one with the gun lying on its side and the stock folded about halfway. That way it's simple to line up the holes of the stock with the ones on the gun in order to reinsert the pin.

The new stock is manufactured by DBoys, so it's not an entirely solid fit on the JG made G36C. There are two things which require attention.

First, the pin holes on the stock are large enough for the pin to actually fall straight through it, so I wrapped some electrical tape around the pin to enlarge the diameter slightly. This also helped with the issue of the stock swinging back and forth completely freely once unlocked. With a tighter pin, there's some friction and the stock wont' flail around if you accidentally let go of it.

Second, the stock will not lock in the folded forward position, because the hole on the side of the stock is too high up compared to the claw protruding from the side of the receiver. This will take some more work to fix. I don't usually run the gun with the stock folded, but being something of a perfectionist, I must make this work, even if only to know it works the way it should.


The stock can be extended through four different settings, the shortest of which actually makes it shorter than the standard stock. The inside is completely hollow, so it could house a huge battery or other items if needed. The hollowness does have a downside, though. Since the material is not exactly heavy duty plastic, the stock also sounds quite, well, hollow. It was also a bit wobbly, but that was easily fixed by applying a few layers of electrical tape on the inside surfaces.


If there was once a problem with the sight picture when using a proper cheek weld with the old stock, that is now completely gone with the new one. The iron sights line up just so when I bring the gun up.


Then again, with the reflex sight on, the problem returns, although with much less severity. Perhaps a lower, tube style red dot sight would work better here. I see a future investment already.


All in all, despite the few issues, I'm more than happy with the new accessories. The grip feels much sturdier and the ability to extend the stock makes for nicer ergonomics all around. Definitely looking forward to fielding this baby as soon as possible.

Wednesday, 24 December 2014

The Compulsory Gift Season Post

I got a load of airsoft stuff for Christmas, and I can hardly wait to put it all into use. I got all of these from my SO, which makes her pretty awesome in my book! I did give her a few (ok, a lot) of pointers on what to get, but who cares. I'm over 30 already, it's not like I'm expecting surprise gifts the way I was as a kid. I get what I like and she doesn't need to worry if she's bought the right thing. Everybody wins.

Anyway, here we go:


Pictured above are

  • GFC MOLLE leg panel
  • GFC PASGT replica helmet
  • GFC Hard knee pads
  • AE 30x200mm silencer
  • Bollé Tracker II goggles, smoke lens
  • FMA RIS Vertical Grip
  • GFC Three point sling
  • DBoys G36 collapsible stock
  • APS Bird Cage Flash Hider
  • VB Li-Po Battery 7.4V 2200mAh 20C


I have no real idea what to do with the helmet or the leg panel, but they look pretty cool. The helmet is very light and thin, so it's not exactly a realistic replica, but it looks good enough and I'm sure it will keep my head from bumping into hard things well enough. The leg panel hangs from a belt and wraps around your upper leg with a band just like a drop leg holster. I have no clue what the bungee cord is for, though. You can basically slap anything with Molle straps on there. One possibility could be to use it as a very light loadout base, so a few mag pouches and a utility pouch might be good. We'll see.

The knee pads with the hard outer shell will definitely be an upgrade when compared to the soft ones I currently have. The soft ones are light to wear and easy to use, but rocky ground, for example, feels a bit nasty through the fabric.

The stock and the grip are going on the G36C. As I mentioned in an earlier post, the default stock is rather low so you don't really get a good sight picture with a cheek weld. The raised cheek piece on the new one should help with that. I also like the fact that this one is extensible so I can alter the ergonomics. The current front grip also feels too thin and long, so I'm hoping this shorter and stockier one will be a big improvement. A separate post concerning their installation is forthcoming so we can get back to the actual tech side of things.

The Li-Po will be going into the AUG to make sure the motor gets enough amperage. The silencer is also going on the AUG, once I get one more piece that I'm still waiting for.

I have been so happy with my clear Bollé goggles that I thought a pair with darker lenses would be amazing for those brighter days. Plus they look way cooler than the clear ones which is, naturally, the most important thing when you're out in the field.

The flash hider? I don't really know what to do with that, but it was cheap so I thought I'd get it anyway. I might slap that on the G36C as well just to alter the look a bit.

There were a few more things that I got but didn't take a photo of. There's a load of G&G bio pellets, a medical and an admin pouch for my vest and last but not least, an M4 magazine adapter for the G36C. That rifle will be the most specialest little gun soon, just you wait.

I'm off to play with my new toys now. I wish you happy holidays as well!

Friday, 28 November 2014

It's Almost Like The Part I Wanted

A couple of weeks ago I ordered some longer accessory rails for the G36C. I only would have needed one, because I was planning on putting it on the bottom of the handguard, but they would only sell packs of two, meant for the sides.

The default rail feels a bit short in my opinion, so with a longer rail I could have the foregrip a bit closer to my body.

Original grip placement on the default rail


Enthusiastically, I opened the bag of new rails, removed the foregrip and unscrewed the default rail. I began fitting the new rail only to notice it wasn't actually up to spec.

With the front screw hole aligned, the rear one doesn't come even close.


I'm sure you can imagine my disappointment at this point. I had waited for these things to arrive for more than two weeks, and even though they were sold as G36C accessories, they do not fit it. And no, the side rails do not have a different screw placement, so every rail should be able to sit anywhere. Not these things, though. 

After some searching I find the specs for the real steel G36C, and after comparing them to my airsoft gun, I see that the replica is well copied from the original, whereas the rails I got are simply not correctly made. A replacement would take forever to get here, so I just decide to fix this situation myself.

The front screw hole seems like the obvious place to work on this piece, since it's already an oval shape and there's only little material nor is there any actual rail in the way. 

With the rotary tool, I first try a grinding bit with similar dimensions as the hole, with the idea of simply grinding away enough material so that the screw would go through. The grinding tip is too fine, though, so this takes ages. 

I quickly get bored with the lack of progress, and switch over to a cutting bit. I can't use that one from the inside out, though, so the whole front of the hole has to go. The rotary tool is definitely great for this kind of work, since it's light and easy to manoeuvre around. With the cutting tip I can both cut and grind, so in a few minutes I have a nice, clean looking result.


I screw it on, but it's almost as if someone keeps going "Not so fast" all the damn time. Not only is the rail too short, it's also a too thin: Having screwed the rail and the front sling point on, I notice there's a bit of up and down wobble. So off come the screws again and I'm back at the planning stage.

Luckily, it doesn't take long to come up with a solution. I have it handily lying around, and it worked for the AUG, so why would it now work here? So duct tape, the sticky but ever-faithful hound of the handyman, to the rescue!

It sure is thicker now!

Stuffing this thing back into the sling mount isn't easy, but once done and the screws are tightened, it definitely doesn't budge.

I fiddle around a bit with the foregrip to find the perfect placement, and it indeed feels most ergonomic a few centimetres further back from where it used to be. It was all worth it, in the end!

Here we are. It's all better now!

Monday, 20 October 2014

Monday Night Throw-Down

It was supposed to be game day yesterday, but it was sadly cancelled. Determined not to lose the whole day, I borrowed the team chronograph so I could actually measure all my guns once and for all.

Nothing magical, really, I set up a cardboard box filled with a couple of pillows to catch the BBs and shut myself in the study so the cats would stay out of the way and be safe. I stood the chronograph up on a smaller box, gathered my guns and loaded one mag each with 0.20 g BBs.

I also had 0.25 g BBs which is what I normally use in games just for comparisons sake. And it's a good thing I did, because I got some interesting results.

As I mentioned in an earlier post, the AUG has a ported cylinder whereas it should have a non-ported one. After shooting with the ported cylinder, I took out the gearbox, cleaned the outside of the cylinder and put a piece of thick foil and duct tape on top of it to simulate a non-ported cylinder.

In another post I mentioned that the G36C has a screw-adjustable power setting, so I tested it with both the maximum and minimum setting.

I shot around 10 shots per each gun and BB weight and calculated the average. The results of my shots are collected below.


Gun 0.20 g 0.25 g
AUG ported 93 m/s (305 fps)  74 m/s (243 fps)
AUG non-ported 97 m/s (318 fps) 87 m/s (285 fps)
G36C min 109 m/s (356 fps) 96 m/s (315 fps)
G36C max 125 m/s (410 fps) 106 m/s (348 fps)
P226 91.5 m/s (300 fps) N/A


I find most curious how the AUG performed with the ported and non-ported cylinders. The ported seems to give very very different muzzle velocities dependent on BB weight, whereas with the non-ported (well, jury rigged) there's a much less noticeable difference between the BB weights. It's still underperforming a lot when compared with the other rifle. Even on the low power setting the G36C wipes the floor with the AUG, not to mention when turned all the way up. So does the green gas powered P226.

At least the new nozzle is making an obvious difference on the AUG, which was shooting so poorly in the beginning. Still, I'm looking forward to finally getting the spring and the new cylinder. They should finally make the AUG perform the way it should. I'm thinking I might make it into a Designated Marksman Rifle just to see how that works out.

Friday, 17 October 2014

G36C Tilted Flash Hider Fix

There's one thing that's bothered me a while now with the JG G36C, and as the title suggests, it's the flash hider. As it comes out of the box, the hider isn't screwed all the way in, rather it sits a few twists away.

The retaining screw, if tightened properly, pushes the nose of the flash hider up so it's no longer aligned with the barrel. If the retaining screw is left loose, the flash hider can move around. One of my worries is that in either case, BBs might be hitting the flash hider and going every which way.

I've used a scale modelling cutting mat to further illustrate the problem

If you do loosen the retaining screw and screw the flash hider on as far as it goes, it will sit straight.

No more tilt

But then the prongs of the flash hider are no longer properly aligned, and the retaining screw will be in the wrong position.

Retaining screw at around two o'clock position when looked at from the rear

If you're happy with this situation, then your tilt issue is fixed. I wasn't quite pleased here, however, so I sought some other options.

First I thought I could alleviate the problem by simply making the barrel threads tighter with some PTFE tape.

PTFE tape around the threads. You can also see the dents left by the retaining screw on the flat section of the barrel.

The tape was not enough to fix it, though, so I went further. If I could, in effect, lengthen the barrel a bit, the flash hider would tighten at the right spot. I noticed there's a nice flat area inside the flash hider.

Looking into the flash hider from the rear

A properly sized o-ring there would net me the effect I need. Sampling from my sorted o-rings box that I recently bought, I found the fitting one: 9.5 mm (3/8") by 12.7 mm (1/2").

The o-ring placed in the flash hider

With the o-ring in place, I screwed the flash hider back on, and it tightened just right where the retaining screw is pointed downwards.

Fitting tight, retaining screw at 6 o'clock position

The o-ring keeps pressure on the threads, so the flash hider is unlikely to unscrew itself even without the retaining screw, but it's best to tighten it a bit just to be sure. No need to twist it to even close to maximum tightness, though.

Finished fix. Flash hider sitting snug and straight


Sunday, 12 October 2014

G36C Field Day

Another fun-filled game day behind me, I now have some first-hand experience of the JG G36C in action. I arrived an hour early with the friend who first got me into the hobby, in order for us to zero our sights. I could immediately tell there's a lot more power than there is on the AUG. The default hop-up seems to be doing its job quite nicely too, I'm getting great range. The short barrel of the G36C does seem to have some effect on the accuracy, so my shots aren't quite as consistent. I was expecting that, though, and the trade-off between accuracy and handling is more than acceptable in my opinion.

I know I complained about the distance between the bore and the sights regarding the AUG earlier, but this thing has it double. At one point I was pinned down behind some trees and rocks, and decided to crawl a bit to get to a better position. I manage to ninja my way forward about 5 metres and not be noticed. I get the drop on the guy that was suppressing me, but sadly as I took aim and fired prone, I only managed to shoot up some leaves and dirt in front of me. Naturally I got spotted by him and caught an expertly planted BB on the shoulder.

That is some serious distance ("Serious distance" defined scientifically today as "about 10 cm or so")

I called the hit, got up and started walking back to the off-game area. That's when I noticed my drop-leg holster with the P226 in it had twisted forwards around my thigh and had dragged along the ground as I crawled, netting me a nice collection of dirt, pine needles, twigs, leaves, squirrels, and other typical forest ornaments. Maybe it's time for a different holster? I'm starting to notice this hobby is very good at creating shopping needs.

Otherwise I was quite happy with the day. The G36C has some sideways wobble on its stock, but I'm thinking there's a pretty easy fix for it. I'm definitely stoked with my purchase.

Monday, 6 October 2014

G36C - The Arrival

So, the G36C and magazines came in the mail today. What can I say, I'm already in love. I know it's beyond ridiculously silly, but ever since first playing Modern Warfare, this gun has had a special place in my heart.

There she is! The gun is a JG G36C, 3rd generation. The magazines are D-Boys midcaps and hold around 100BBs each. Not pictured is the 1100mAh mini-type NiMH battery it ships with. Battery compartment is in the front handguard.
The gun feels really solid for a plastic framed piece, and it has some serious weight to it. The stock folds to the side and snaps back in place nicely.
Magazine release is the paddle-type, similar to the MP5 and AK series, for example.
 

The rear sight is adjustable with windage adjusted by the hex head screw (2.5mm) on the side, and elevation is controlled by an identical screw on top.


The hop-up adjustment is accessed by pulling back the charging handle. The tilting plastic tip seems prone to snapping off, though.


Once pulled back, the charging handle head can be dipped down for easier hop-up adjustment. I don't know if this is by design or not, but it's handy.

Charging handle held in place, the hop-up adjustment wheel visible through the opening
One of the coolest features is a 2.5 mm hex head screw at the back of the gearbox which you can access by folding the stock. It allows you to set the power of the gun for both QCB and field conditions. Screw in for more power and out for less.

The adjustment screw is just out of sight inside the hole at the back of the gearbox
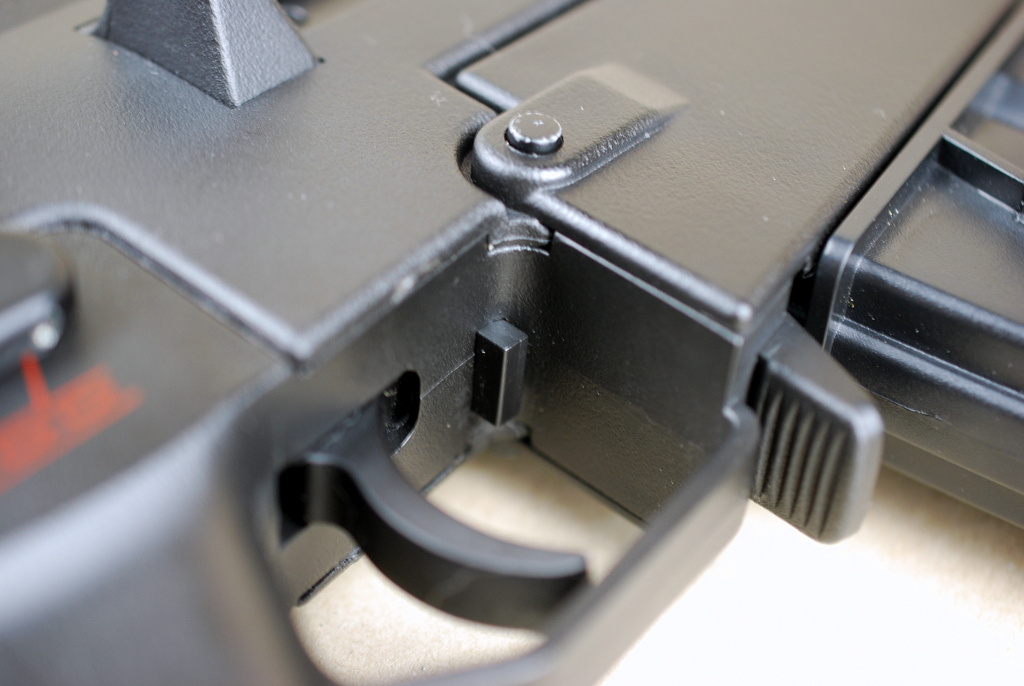
The attention to detail is remarkable. Even the bolt release from the real steel original is modelled, though it is non-functional.

Bolt release button inside the trigger guard, front of the trigger
The gun comes with one short accessory rail under the handguard.

There are attachment points for extra rails on both sides of the handguard as well
The D-Boys magazines are a slightly tight fit, but with some use they fit in very well. I don't think any filing or sanding is necessary, just practice your mag change a couple of nights and you're set. That's what normal people do on normal nights, right?

You can just about see where the magazine connects with the magwell and the slight scuffing that's left behind after some furious reload drills
Perhaps the only downside I can think of at this point is the fact that with a proper cheek weld, you don't really get a sight picture at all, because your eye will be so much lower than the sights.

This is pretty much the view you're greeted with when your cheek is on the stock
I'm definitely fielding this baby the first chance I get. Since the AUG is under performing so horrendously, I'm making this my number one gun, at least until the AUG is back in action.
I moved the reflex sight over to the G36C, and am trying out the vertical grip that I got with the AUG. It never really fit on there, but here it seems a lot better. The cheek weld problem is naturally further emphasized with the reflex sight since it sits even higher up, but at least you don't need to align two sights, it's enough to see the reticle.
I wish it was game time already.

Cool and collected